


Hey everyone, by popular demand, here I am! I’ll be going to share some basic tips on photography with you guys.

First and foremost; a disclaimer. I don’t count myself as a professional but I would like to think I understand the basic concepts of photography and also how to use my equipment, so don’t take my words as a “manual” of sorts. I’ll just share some tips that some of you guys might have never thought about, OK?
Also, all of these pictures are not edited, as I am simply too lazy.
Anyway, before this post, I will assume that:
(1) You understand the basics of photography, i.e. aperture/shutter speed/iso, lighting, and etc.
(2) You know how to use your equipment
If you guys think I should write about these 2 things, feel free to let Bobo know.
Anyway, in this post, I’m going to talk about how to plan your travel itinerary for the best possible pictures. Not many people give much thought to this but it is really important! You have to realize that the light changes throughout the day, from soft, to harsh, to a warm, golden hue. Not to mention weather conditions too.
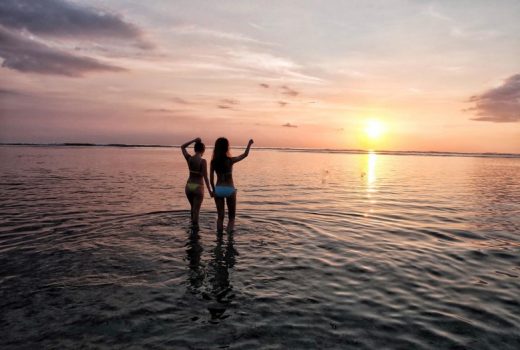
Typically I like to take my pictures right after sunrise for the soft lighting and sunset for the awesome gold light (we call this time “golden hour”).
If you are heading to Bali for instance, you need to know that the sun rises at about 5.30am and sets at around 6pm. This depends on the time of the year, but you can easily Google “Bali sunrise/sunset” and it will tell you the exact time. Or else, you can download apps that will tell you this info based on your location.
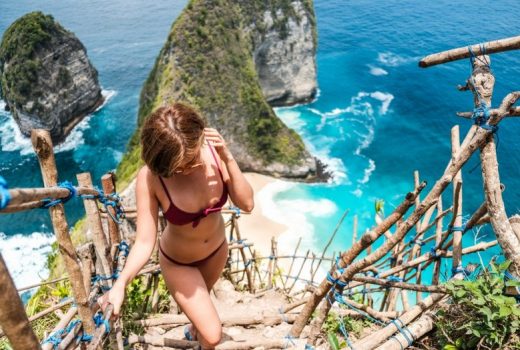
The picture above was taken during sun set and since I knew I needed to reach the beach by 5.30pm, and I needed 1.5 hours to reach there from Seminyak, we needed to leave by 4pm. I also figured that I wanted to be there at sunset and not sunrise because the tide will be really low, and you will see nice reflections on the wet sands.
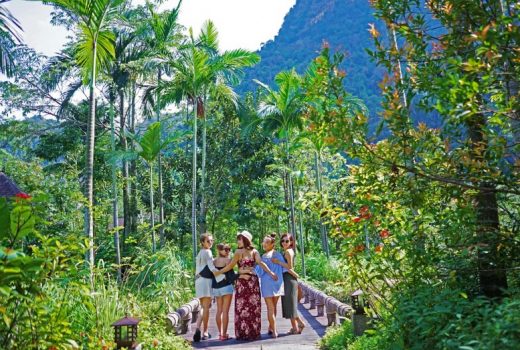
For this shot above, I knew I wanted to reach the waterfall really early to avoid other tourists and also to catch the softer morning light, but at the end we failed due to traffic. We got there at around 11am and the sun was already almost at it’s highest point, but if you compose your image well, you can still use this to your advantage. You can see Bobo’s curves are highlighted by the shadows created by the harsh light.
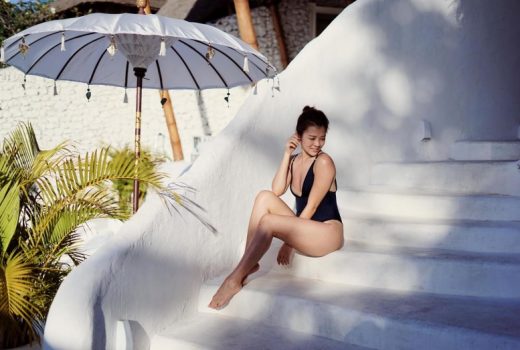
This shot above is an example of really soft morning light. You won’t see harsh shadows but be careful when composing as the sun is shining from an angle, you will have certain parts dark.
It’s also important to scout your location if you plan to shoot there for a longer period, such as our hotel. Look out for parts that get the sun rays in the morning and during sunset.
These steps were getting nice morning rays so we chose to shoot here.
And this part of the steps were getting nice golden rays in the evening. The gold lighting creates nice contrast and also shadows for you to play with.
This is a shot we took at close to noon. You can see the harsh lighting but you can still shoot during this time, just be careful of how you face the sun when posing. Make sure your subject’s face is not in shadow by moving her face around ’till you get the best results.
If you look at the first image on the black sand, you can see the effect of the sun’s angle on Bobo. If she sits facing the sun, her whole body and face will be lit. If she moves 90 degrees, you can create some shadows to create some depth and highlight certain curves.
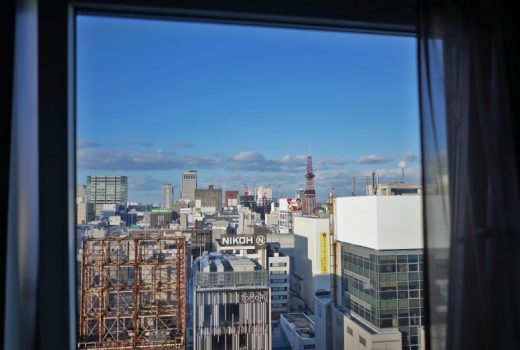
Usually if we are at a beach vacation, we will just chill out, have good food, and take a swim between noon and 3-4pm as this is not the best time to take pictures. However, if you are in a city, just be smart, try not to shoot at the sun, or else pose in shadows created by buildings to properly expose your image.
Haha, last but not least, you have to use a bit of common sense and you can predict the places where you can take full advantage of the nice light. There are so many nice beaches/cliffs/paddy fields/waterfalls in Bali, but you need to figure out where they are located. For instance, Nusa Dua faces east, and Uluwatu, Seminyak, Canggu, face west.
Dont go to a beach in Uluwatu expecting to catch some morning rays when shooting out towards the sea, and vice versa, don’t to go Nusa Dua to watch the sun set over the sea. It just won’t happen. If you are not sure or never been to your destination, Google Maps is your best friend. Do some research beforehand, look at the Street View and you’ll get a good idea of what to expect.
So anyways, I hope you guys learned something from this, and don’t be afraid to ask us any questions. Practice makes perfect, and if you plan ahead, you will reduce the chances of getting poor images.
No Comments